Looking for the best Microphone Settings for Windows 10 to enhance your mic’s performance. Well, this article is all that you need.
If you have one or multiple microphones connected to your device, you would want to learn a certain microphone setting for Windows 10.
These settings help you to set up a comfortable working configuration for yourself. No one is born as an expert; we all learn with time and experience.
So, without wasting any time, let’s see what it takes for microphone settings in Windows 10.
The entire process involves a few steps using the control panel.
There have been some recent changes made into the system that allow the user to manage microphone settings using the settings app.
Look into the given points to check if any of the below concerns bother you. If you relate to any or all of these concerns, I have a detailed step to step solution waiting for you in the article.
- Setting up microphone as default using Settings
- Renaming microphone using Settings
- Enabling or disabling a microphone on Windows 10
- Enabling or disabling microphone from Manage sound devices
- Fixing microphone problems using Settings
The steps of the Windows 10 guide are in accordance with all the latest updates, and they will resolve any or all of the above issues.
How to set microphone as default using Settings?
Often users are provided with two individual or multiple microphone set ups. For example, you may have one webcam mic and one external mic. Now if you want to choose any of these to set up as the System Default microphone, follow the given steps and proceed.
- (i) Open Settings
- (ii) Now go to System by clicking on it.
- (iii) Next, click on Sound.
- (iv) Do you see the “Input” choice? Here, you need to open the drop down menu and select one of the two microphone choices that you want to use as a System Default microphone system.
Hurrah! You enabled the selected microphone system as your System Default microphone!
How to Rename microphone using Settings?
After you have selected your default microphone, you might want to know about:
How to Rename a microphone using Settings.
The Settings app allows you to change the names of your microphones as and when you want.
- (i) Open Settings
- (ii) Now, click on Settings
- (iii) Next, click on Sound
- (iv) Go to the “Input” section.
- (v) Select Device Properties option from there.
- (vi) Give a descriptive name to your microphone.
- (vii) Now, click the Rename Button
If you see the custom name for apps and systems, it means you have successfully completed the process of re-naming your microphone.
How to enable or disable a microphone on Windows 10?
I have a dedicated article on this, check out how to enable mic on windows 10 here.
You can enable or disable a microphone as and when needed from at least two different locations.
To do so, you need to follow these steps:
- (i) Open Settings
- (ii) Select System
- (iii) Next, click on Sound
- (iv) Go to the “Input” section
- (v) Click the Device properties option
- (vi) Either you may click the enable button. This will turn on the device.
- (vii) You may also check the Disable option. Windows 10 app will cease to have access to the microphone.
How to enable or disable microphone from Manage sound devices?
If you want to enable or disable one or more mics, using Manage Sound devices; Proceed with these steps:
- (i) Open Settings
- (ii) Click on System
- (iii) Now you need to Click on Sound
- (iv) Next, go to the “Input” section, click the Manage sound devices option.
- (v) Select the microphone under the ‘input’ section.
- (vi) Click the Disable button. (but to enable the device, clear the Disable option.
Similarly, you can repeat the 4th, 5th and 6th steps to enable or disable multiple microphones. The mics that you disabled will cease to work for for the system or apps.
How to fix microphone problems using Settings?
If your device isn’t able to recognize the microphone, or it’s only working for some applications, you can troubleshoot and fix most common problems using the Privacy settings and the troubleshooter tool.
What to do to make the system and apps access my microphone?
You may fix this problem using the Privacy Settings:
To make the system and apps to access your microphone, Follow the steps:
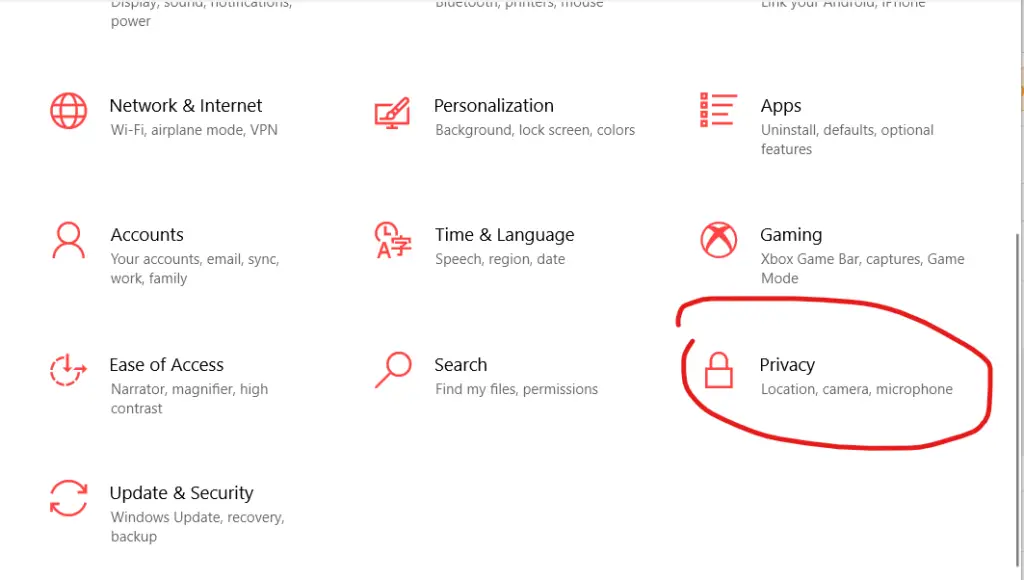
- (i) Open Settings
- (ii) Click on Privacy
- (iii) Now, select the Microphone
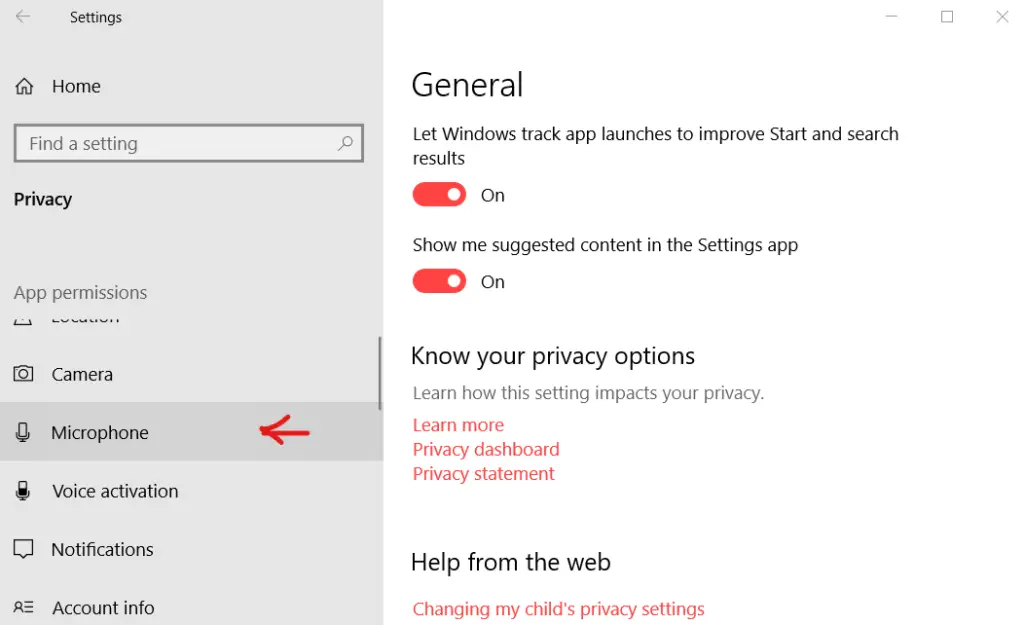
How to set whether other users can select if their apps can use the microphone?
To do this, you need to go to the Microphone page. Click the Change button, and then turn on the toggle switch to allow access by other users.
What to do if one or more applications can’t access the mic?
Here, it might be a simple but a common issue. Well the solution very simple again. Just make sure that toggle switch is turned on.
If a certain application still does have an access to the microphone,it may be because the app has a restricted access.
You can, go to the app name in the list, Next, go to “Choose which apps can your microphone ” and switch on the toggle switch .
How can I fix microphone issues using the troubleshooter?
If the microphone shows any functional problem, you can use the built-in troubleshooter tool to fix those problems.
Here are the steps:
- (i) Open Settings
- (ii) Click on System
- (iii) Click on Sound
- (iv) Go to the “Input” section
- (v) Now, click the Troubleshoot button
Follow the on-screen directions to fix the issue.
What to do if: The microphone volume is too low?
You can try solving this issues using the following solutions:
- (i) Make sure that the microphone or headset is connected properly to your system.
- (ii) The microphone should be positioned correctly.
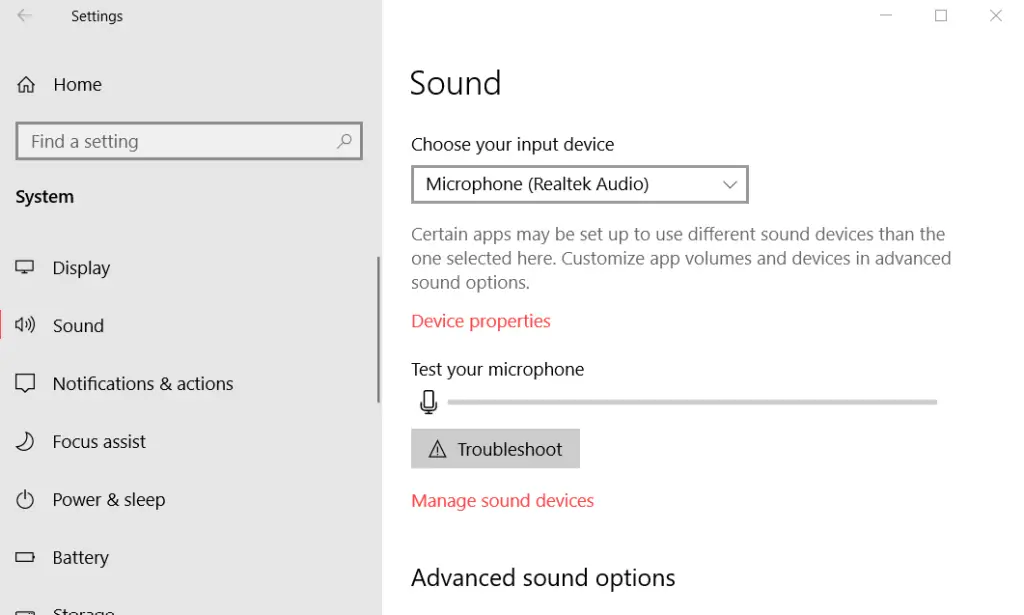
- (iii) Now, increase the volume of your microphone. Before that you can test your sound levels by testing it in settings>sound. Refer to the image below:
Now let’s check how can we increase the mic volume.
How to increase the volume of your microphone in Windows 10?
- (i) Select Start
- (ii) Click on Settings
- (iii) Go to System
- (iv) Now, select Sound
- (v) Go to the ‘Input section’
- (vi) Select Device Properties. ( Your microphone must be selected as your input device)
- (vii) Do you see the Levels tab? Adjust the Microphone and Microphone Boost sliders the way you want.
- (viii) select OK
Testing:
Talk into your microphone and check under Test your microphone to make sure your changes are noted.
You will observe the line moving from left to right, your microphone is working on the new settings.
If you see no change in the line, then probably the microphone is not able to pick up any sound.
Over to you: The Best Microphone Settings for Windows 10
Which settings worked the best for your mic? Let me know down in the comments below.
Once you finish the steps, you can start using the microphone with any application of your choice on Windows 10.
If you still face any hindrance while making the mic work, you also have an option to use a different port or a different cable with your system.
Hope you find the article helpful and I would soon hear a thanks from you!