We all know how it feels when water gets into our electronic devices. It’s frustrating, and we start to panic because we don’t want them to get damaged. The same goes for microphones, and it can be a nightmare if water gets into them.
If you’re a content creator or someone who uses microphones frequently, then you know how important it is to keep them in top condition.
In this blog, I will guide you through some quick and easy solutions to get water out of your microphone. I’ll also cover what to do if your microphone has experienced water damage and how to properly clean it.
Additionally, I’ll answer the question of whether there are any waterproof microphones or mic cases available on the market.
So without any further ado, let’s dive in!
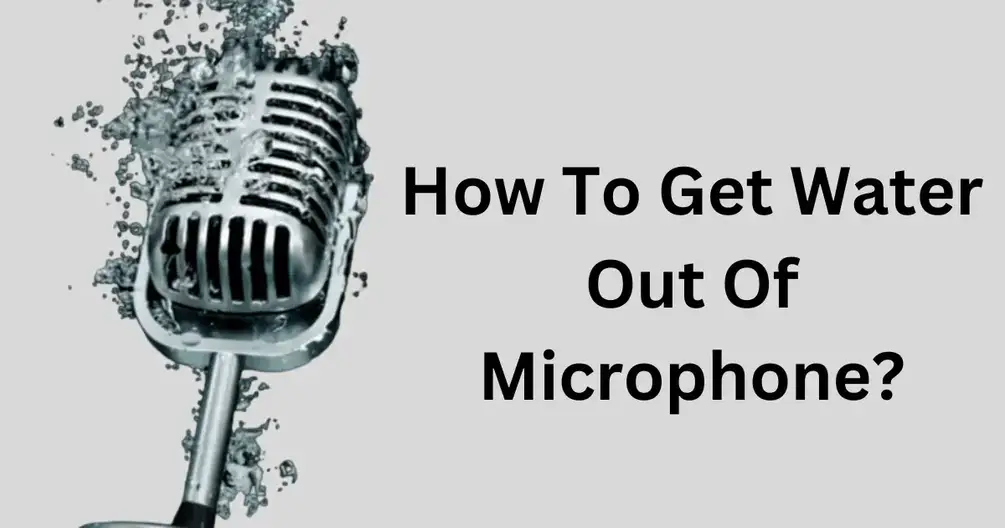
How To Get Water Out Of Microphone?

If your microphone got wet or went underwater, here are three ways you can try to get the water out: use a hairdryer, an airtight pouch of rice, or an oven.
Let’s go through each of these methods:
Using a Hairdryer
A simple way that works well is using a hairdryer. You can also use a blow dryer for this. Put the microphone where the hot air blows directly and leave it there until most of the water dries up.
Important things to remember when doing this are to turn off the microphone and start with low heat. The hairdryer is a fast and easy way to remove moisture, but if you don’t do it right, it might cause more problems.
So, be careful when using this method.
Using an Airtight Rice Pouch
Another way to dry your microphone without using a dryer is by using rice. Rice can absorb moisture well, so this is helpful when you don’t have a dryer nearby.
Get a container, put some rice in it, and place the microphone on top. Make sure everything is sealed properly, so moisture from outside doesn’t get in. Leave it like that overnight or until most of the moisture is gone from the microphone.
Using an Oven
You can use an oven to remove moisture from your microphone, but it takes longer. Ensure all connections are sealed before placing it in the oven. Set the oven to 120 degrees Fahrenheit for at least an hour. Remember to turn off the microphone while it’s in the oven.
After an hour or two, check if any water is coming out of the microphone. If not, turn it off and remove it immediately to prevent burning due to high temperature.
How to Eject Water from iPhone Speakers?

Even if iPhones don’t have a built-in way to get rid of water from the speaker, there are three simple tricks you can use to make it happen. No matter which method you choose, they all use high-pitched sounds to push the water out.
Use the Sonic App

The easiest way to get water out of your iPhone’s speaker is to download a special app from the App Store.
I’ll show you how to do it using a free app called Sonic.
- Go to the App Store and install Sonic.
- Open the Sonic app on your iPhone.
- Press and hold the water drop icon.
- Swipe on the screen to change the frequency, or use the plus (+) and minus (–) buttons.
- Do this a few times until all the water is gone.
- Press Stop to finish the process.
Using the Water Eject Shortcut

Here’s a fast and easy way to get water out of your iPhone’s speaker: use the Water Eject Siri shortcut.
Just follow these steps:
- Get the Water Eject shortcut.
- Tap on “Get Shortcut” and then “Add Shortcut.”
- Tap the Water Eject shortcut to run it.
- You can also say, “Hey Siri, Water Eject” to start the shortcut.
- Press “Begin Water Ejection” and make sure the volume is set to the maximum.
- Hit the Stop button when you’re done to finish the process.
Using Online Tone-Generators

If you don’t want to bother with apps or shortcuts you’re not sure about, here’s another way to remove water from your iPhone’s speaker using free online tools:
- Go to a website like FixMySpeakers or OnlineToneGenerator.
- On FixMySpeakers, touch the water droplet to make a sound play.
- On OnlineToneGenerator, press Play and move the slider to set the volume.
- Hit the pause button when all the water is out of the speaker.
How To Remove Water From A Microphone Headset?
If water has gotten into your headset microphone, follow these simple steps to remove it:
-
Disconnect from Device:
- Unplug your headset from the device it’s connected to.
-
Remove Coverings and Dry:
- Take off any covers from the microphone.
- Use a soft towel to gently absorb the liquid.
- Let the microphone dry on its own at room temperature.
By disconnecting, removing coverings, and gently drying with a towel, you give the microphone a good chance to get rid of the water without causing further damage. Just be patient and let it air dry.
What Can You Do If Your Microphone Experienced Water Damage?

If you discover that the inside electronics of your microphone are damaged after removing the grille and windscreen, here’s what you can try:
-
Hair Dryer Technique:
- Take out the internal electronics of the microphone.
- Use a hair dryer set on a cooling setting to quickly dry them.
-
Rice Submersion:
- If the hair dryer doesn’t work, try submerging the microphone in rice for a day.
- Ensure all electronics are accessible by the rice to absorb moisture.
-
Replacement of Damaged Parts:
- If the damage seems irreparable, identify the specific damaged electronic elements.
- Search online for replacement parts and consider replacing them yourself.
- If you’re not comfortable with DIY repairs, check with local music shops for professional help.
Remember, it’s crucial to act quickly and try these methods, but if they don’t work, seeking professional assistance may be the best way to save your microphone.
How To Dry Out Microphone If Damage Is Due To Soft Drinks, Sweat, And Other Liquids?
If your microphone got damaged by soft drinks, sweat, or other liquids, drying it out depends on the type of liquid involved.
Here’s what you can do:
-
For Soft Drinks, Cola, Sports Drinks, etc:
- Remove the batteries immediately.
- Clean out as much of the liquid as you can.
- Take off the windscreen or pop filter covering the microphone.
- Rotate the grille anticlockwise to remove it.
- Clean all parts of the microphone to remove any contaminants.
- Let the microphone air dry.
- Check the sound quality once it’s dry.
- If it works fine, you’re good to go. If not, get professional help for repairs.
Remember, the key is to act quickly and clean thoroughly to minimize damage caused by the liquid.
How To Properly Clean A Microphone?

Keeping your microphone clean is important to make sure it works well.
Here’s an easy way to clean it:
-
Canned Air Cleaning:
- Use canned air (compressed air) to blow away any loose or stuck particles.
- Hold the canned air upright, about 12 inches away from your mic.
- Don’t spray directly on top; instead, aim between buttons and vents to avoid damage.
- Ensure vents are not blocked after cleaning.
-
Cotton Swab and Rubbing Alcohol:
- For a deeper clean, use a cotton swab with rubbing alcohol.
- Point the mic downward to let gravity help pull out any liquid.
- If there’s dirt, dab rubbing alcohol on the q-tip and gently wipe.
- Don’t soak or let liquid get inside the mic to prevent damage.
-
Avoid Water and Sprays:
- Never use water to clean your microphone; it doesn’t mix well with electronics.
- Avoid spraying anything into the device to prevent liquid damage.
-
Let it Dry:
- After cleaning, let your microphone thoroughly dry before using it again.
- Check that vents are clear and there’s no dirt inside.
By following these simple steps, you can keep your microphone clean and in good working condition.
Are There any Waterproof Microphones or Mic Cases?

For many mic owners, the idea of finding a waterproof microphone or case has crossed their minds, especially for those in performance bands or with expensive microphones.
Here’s the scoop:
-
Waterproof Microphones:
- There are waterproof lavalier microphones, great for recording video audio without worrying about water damage.
-
Waterproof Microphone Cases:
- While waterproof microphones for instruments may be hard to find, there’s a wide variety of waterproof microphone cases.
- You can get smaller hard cases designed for specific microphone models.
- Consider options like the Casematix Customizable Foam Case, which is not only waterproof but also customizable and lockable.
So, if you want to safeguard your microphone during transit or performances, there are plenty of waterproof microphone case options to choose from.
FAQ’s:
How do I get water out of my iPhone Microphone?
Here are some tips to get water out of your iPhone microphone:
First, don’t charge your phone if it got wet, as this can cause damage. Next, wipe off any excess moisture with a soft, lint-free cloth. Then, place your phone in a bowl of uncooked rice or silica gel packs for at least 24 hours. The rice/gel will help absorb the moisture. Finally, after drying, check if the microphone is working properly again. If not, you may need to take it to an Apple store for repair, making sure to also check the charging port for any trapped water.
Is there a safe way to dry out a Dynamic Microphone if they get Wet?
Yes, there are safe methods to dry out a wet dynamic microphone.
Here are some tips for safely drying out a dynamic microphone that got wet:
- First, unplug the microphone and disconnect it from any other equipment. Do not leave it plugged in or use it while wet.
- Next, gently shake out any excess water and use a soft, absorbent cloth to dab or lightly wipe the surface. Avoid rubbing too hard.
- Then, place the microphone in a dry, warm area with good airflow for 24-48 hours. Position it upside down to let moisture drain out. Silica gel packets can help absorb dampness.
- Once fully dried, test the microphone before using it again. If issues persist, you may need professional repair. With care, dynamic mics can recover after light exposure to moisture.
How does a Low-Frequency Tone get Water out of the Phone Speakers?
Speakers work by moving air to create sound waves. A low-frequency tone creates larger, more powerful sound waves inside the speaker. As the speaker cone moves back and forth, the low frequency vibrations shake and dislodge water stuck in the speaker.
The water particles vibrate more intensely and are essentially shaken loose by the larger sound waves. This allows the water to be pushed out of the speaker. The tone needs to be played at high volume so the sound waves are strong enough to remove the trapped water.
Is it safe to use a Hair Dryer or other Heat Source to dry out a Microphone?
No, it is generally not recommended to use direct heat sources like hair dryers to dry out microphones. The high, concentrated heat can potentially damage delicate electronic components inside the microphone. It can also cause plastics and microphone membranes to warp or melt.
A safer approach is to allow the microphone to fully air dry in a well-ventilated room at normal temperature. Place it upside down to allow moisture to drain out. Using a desiccant like rice or silica gel can help absorb excess moisture without applying direct heat. Avoid any heat exposure more intense than indirect sunlight to ensure the microphone components are not compromised.
Can Silica Gel Packets help to Remove Moisture from a Damp Microphone?
Yes, silica gel packets can effectively remove moisture from a damp microphone. These packets are known for their moisture-absorbing properties and are commonly used in electronic devices. To use them, place the microphone and the silica gel packets in an airtight container, allowing several hours for the packets to absorb the moisture. After that, you can safely use the microphone again.
How Long does it take for a Wet Microphone to dry out Completely?
The drying time for a wet microphone can vary depending on the severity of the water damage. To ensure it dries out completely, leave the microphone in a dry and warm environment for at least 24-48 hours. Avoid using heating devices as they can further damage the microphone. If it still doesn’t work after drying out, consider repair or replacement.
How can you Prevent Water Damage to your Microphone in the Future?
Here are some tips to prevent water damage to your microphone in the future:
- Avoid exposing your microphone to moisture-prone environments when possible. Keep away from direct splashing water.
- Use a windscreen cover to protect the microphone from light rain or moisture. A foam windscreen can absorb some water contact.
- Store the microphone in a dry, room temperature area when not in use. Allow it to fully air dry if exposed to any water before storing.
- Consider investing in a waterproof microphone designed to withstand wet environments. Look for waterproof casings or coverings.
- If using outdoors, set up a popup shelter or canopy to shield mics from unexpected weather. Take precautions if liquid could spill on stage.
Are there any Special Cleaning Techniques you should use on a Water-Damaged Microphone?
Here are some tips for cleaning a water-damaged microphone:
- Avoid getting moisture in any open ports or vents. Use compressed air to dry out vents.
- Disinfect with isopropyl alcohol and a soft cloth. This helps prevent corrosion and debris buildup.
- Gently wipe exterior with a dry, soft brush to lift debris once dry.
- Do not use chemical cleaners, soap, or detergents which could leave residue.
- After cleaning, allow microphone to fully air dry in a room temperature, dry space before use. Test microphone thoroughly after drying to ensure proper function.
Conclusion
In conclusion, accidents happen, and water damage to your microphone can be a frustrating situation.
However, there are several quick solutions that can help you remove the water and salvage your microphone. From using a hairdryer to an airtight rice pouch or even an oven, these methods can effectively dry out your microphone and restore its functionality.
If your iPhone speakers are affected, you can utilize apps like Sonic or the Water Eject Shortcut to remove the water. It’s important to take immediate action when dealing with water damage to prevent further issues.
Additionally, proper cleaning and maintenance of your microphone can help prevent future damage.
Remember to handle your microphone with care and consider investing in waterproof microphones or mic cases for added protection.


