Are you looking for ways to enhance the audio quality of your iPhone videos?
Using an external microphone can be a game-changer. Not only does it improve sound clarity and reduce background noise, but it also enhances the overall production value of your videos.
In this blog post, we will provide you with expert tips on how to connect an external microphone to your iPhone.
We will cover all methods, including the USB-C connector, Lightning adapter, and 3.5mm headphone jack method (if you’re using an older iPhone model).
We will also provide you with tips on how to get the best sound quality with an external mic and answer some frequently asked questions about using an external microphone with your iPhone.
So read on to take your video recording game to the next level!
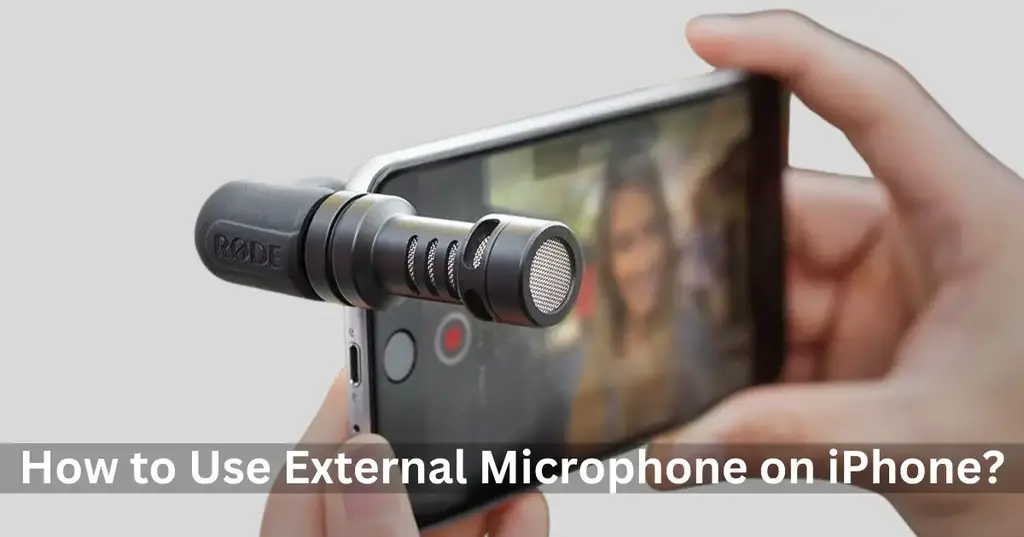
How to Connect an External Microphone to Your iPhone?

If you want your videos to sound better or if you’re recording audio for a podcast and want it to be top-notch, you can make it happen by connecting an extra microphone to your iPhone.
Here’s how you can do it.
USB-C Connector Method

The newest iPhones now have a different kind of connector called USB-C instead of the lightning port.
If you want to use an external microphone on your iPhone, you’ll need a USB adapter or USB camera adapter. This adapter allows you to connect your microphone through the USB-C port of your iPad Pro, iPad Air, or iPad Mini. You can also use a XLR microphone and a USB port to get high-quality audio on iPhone models like iPhone 15 and iPhone SE.
Another way to get great sound is by using a headset with a built-in microphone that connects through the USB-C port. This method gives you complete control over the headphone output level. If you want to use a wireless stereo microphone system like the Wireless GO II, which is compatible with the latest iPhones, you can connect it through a USB-C connector and an Apple Lightning to 3.5mm Headphone Jack Adapter.
Lightning Adapter Method

If your newer iPhone doesn’t have a headphone jack, you can connect your microphone to the lightning port using a 3.5mm TRRS Microphone Adapter. This is important to get great audio quality on the latest iPhones.
5mm Headphone Jack Method (Older iPhone Models)

If you have an older iPhone, you can just plug a TRRS microphone directly into the headphone socket. It’s a simple and easy way to make your audio better without any fuss.
Is Your iPhone External Microphone Not Working?

To troubleshoot microphone issues on an iPhone, follow these steps:
- Ensure the microphone is properly connected to the headphone jack or Lightning port.
- Verify that the microphone is compatible with iPhones as not all external mics work correctly.
- Check the microphone settings on the iPhone. Go to Settings > Sound and ensure the microphone is not muted and the input volume is turned up.
- Make sure the app you’re using has microphone permissions enabled and is updated to the latest version.
- Determine if the issue occurs with one specific app or all apps, as this can indicate an app-specific problem.
- Restart the iPhone to reset any software glitches and test the external microphone again.
- Clean out any debris, dirt, or damage from the headphone jack/Lightning port using compressed air.
- Update the iPhone’s software by going to Settings > General > Software Update and installing the latest iOS update.
- If necessary, reset the iPhone’s settings back to default by going to Settings > General > Reset (this won’t erase data).
- As a last resort, restore the iPhone. Backup data first, then erase the iPhone and restore from the backup. This will reinstall iOS fresh.
If none of these steps fix the issue, it’s likely a hardware problem requiring professional repair. Contact Apple Support for assistance troubleshooting further.
How to Get the Best Sound Quality with an External Mic?

To get the best sound quality with an External Microphone follow the steps below:
- Choose the right type of mic for your needs – condenser, dynamic, lavalier etc. Condenser mics typically provide better sound quality but may pick up more background noise. Dynamics reject noise better.
- Use a microphone with a frequency response suited to your audio application – vocals, instruments, podcasts etc. Look for mics rated 20Hz to 20kHz for high-fidelity audio capture.
- Match the impedance and output level of the mic with your recording device using the appropriate adapters if needed. This prevents signal loss or distortion.
- Set the right gain levels in your recording device or software. Having the levels too high results in clipping and distortion. Too low leads to a noisy signal.
- Use a pop filter to cut out plosives and add a windscreen for any outdoor recording. This cuts down on unwanted breath noises.
- Shock mount the mic to dampen vibrations if needed. This is essential with highly sensitive condenser microphones.
- Record in an ideal location. Choose a quiet room with soft furnishings to absorb sound for voice work. For acoustic instruments find a live room with good acoustics.
Use high quality cables designed for microphones. Avoid long lengths that can impair sound quality over distance.
Tips for iPhone External Microphone Use

Here are the top tips for using an external microphone with your iPhone:
- Choose the right type of microphone – For general iPhone video and audio recording look at cardioid condenser microphones which provide clear audio quality. Lavalier mics allow hands-free usage if desired.
- Ensure microphone compatibility – The iPhone has a lightning port. So you need microphones designed specifically for iOS devices with a lightning connector or adaptors for other mics. Avoid any which require phantom power.
- Use a windscreen – Adding a windscreen or deadcat minimizes wind interference which is important for outdoor iPhone recording.
- Get the microphone input levels right – Set levels correctly within the iPhone’s microphone input settings to avoid distortion from loud noises or clipping.
- Monitor audio with headphones – Listening live helps ensure proper positioning and input levels for the microphone during recording.
- Use a tripod – Having the iPhone fixed in place on a tripod or rig keeps the microphone positioned properly and steady.
- Try different apps – Apps like FiLMiC Pro allow more control over iPhone microphone inputs than the standard camera app.
Paying attention to these basic principles allows you to record high-quality audio by effectively utilizing the iPhone’s external microphone capabilities.
FAQ’s:
Can I use an External Microphone with my iPhone?
Yes, it is possible to use an external microphone with your iPhone.
For newer iPhone models, you will need a lightning to 3.5mm adapter or a lightning-enabled microphone. Using an external microphone can greatly enhance the audio quality of your recordings. Choose the right type of microphone based on your specific needs and preferences.
What Type of External Mics can I use with the iPhone?
There are various external microphones that you can use with your iPhone, such as lavalier, shotgun, and handheld mics. Popular brands like Rode, Shure, and Audio-Technica offer iPhone-compatible options. Just make sure the microphone you choose is compatible with your iPhone’s lightning port or headphone jack.
Do I need an Adapter to Connect a Microphone to the iPhone?
To connect a microphone to your iPhone, you may need an adapter depending on the type of microphone you have. For microphones with USB-C or Lightning connectors, no adapter is required.
However, if you have a microphone with a 3.5mm headphone jack, you will need an adapter that converts from 3.5mm to either USB-C or Lightning.
What is the Best iPhone® External Microphone for Video Recording?
The Shure MV88 is considered the best iPhone external microphone for video recording. It’s a condenser mic that easily connects through the iPhone’s lightning port. The Shure app allows you to monitor levels and EQ for optimal audio quality while filming videos.
Are There any Recommended Apps for Recording with an External Microphone?
Yes, there are apps that are recommended for recording with an external microphone on your iPhone.
Some popular options include Filmic Pro, ShurePlus MOTIV, and RØDE Rec. These apps offer advanced audio settings and controls to enhance sound quality. Always check the compatibility of the app with your external microphone and iPhone model.
My iPhone isn’t Recognizing the External Microphone. What Should I Do?
If your iPhone isn’t recognizing an external microphone, the first thing you should do is check that the microphone is designed for use with iPhone and has a Lightning connector.
If it has a different type of connector, you’ll need a Lightning adapter. Make sure the adapter is properly connected and the iPhone’s microphone settings under Camera are set to use an external mic input.
If you’ve verified the microphone and adapters are compatible, try connecting to a different iPhone or Apple device to rule out a problem with the mic itself.
If it still isn’t recognized on any Apple device, you most likely have a faulty adapter or microphone that needs replacing.
As a last resort, inspect the iPhone Lightning port for damage and debris – you may need to take the iPhone in for service if connection hardware seems functional but the mic still isn’t being recognized through the port.
Conclusion
In conclusion, using an external microphone with your iPhone can greatly enhance the sound quality of your recordings.
Whether you are a content creator, journalist, or simply someone who wants better audio for their videos, connecting an external microphone is a simple and effective solution.
By following the methods outlined in this blog, you can easily connect different types of microphones to your iPhone.
Additionally, optimizing the sound quality requires some additional tips and tricks, such as adjusting levels and using recommended apps. Remember to troubleshoot any issues that may arise, and don’t hesitate to seek further assistance if needed.
Start exploring the world of high-quality audio recording with your iPhone today!


