Are you wondering if your iPad has a microphone? The answer is yes!
iPads have built-in microphones that can be used for various purposes such as recording audio, making video calls, and even using Siri.
In this comprehensive guide, I will discuss everything you need to know about the iPad microphone.
I will cover topics like where the microphone is located on an iPad, how to turn it on, and what it’s used for. Additionally, I will explore the features to look for in a good microphone for your iPad and what kind of connector is compatible with it.
Lastly, I will address some frequently asked questions about iPads and microphones so that you can make informed decisions about using this device to its fullest potential.
Do iPads Have Microphones?

Yes, all iPad models come with built-in microphones. The microphones allow you to record audio, capture videos with sound, make FaceTime or phone calls, and use voice commands like Siri.
The exact number and quality of microphones varies by iPad model. Generally, newer iPads have more advanced microphones capable of capturing higher-quality audio. But even basic iPad models contain at least one microphone suitable for basic tasks.
So, all iPads have microphone capabilities built right in, making them convenient for various audio needs on the go. The microphones let you record, communicate, and control your iPad using just your voice.
Where is the Microphone Located on an iPad?
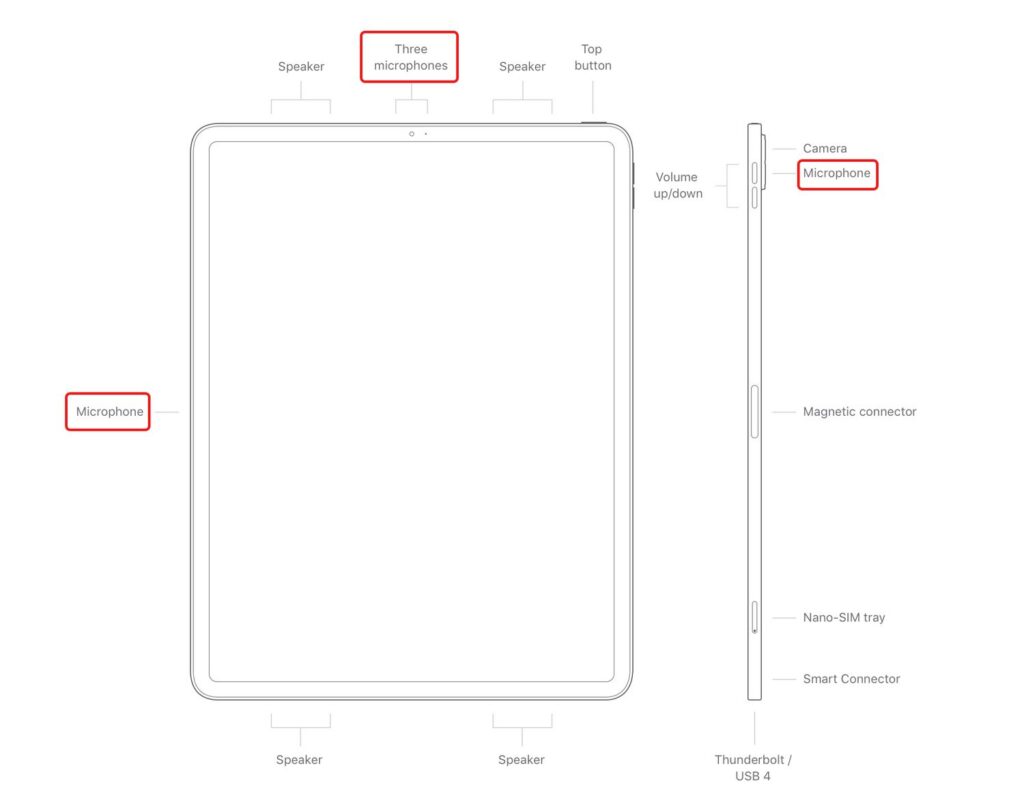
The microphone on an iPad is located along the top edge of the device, above the screen.
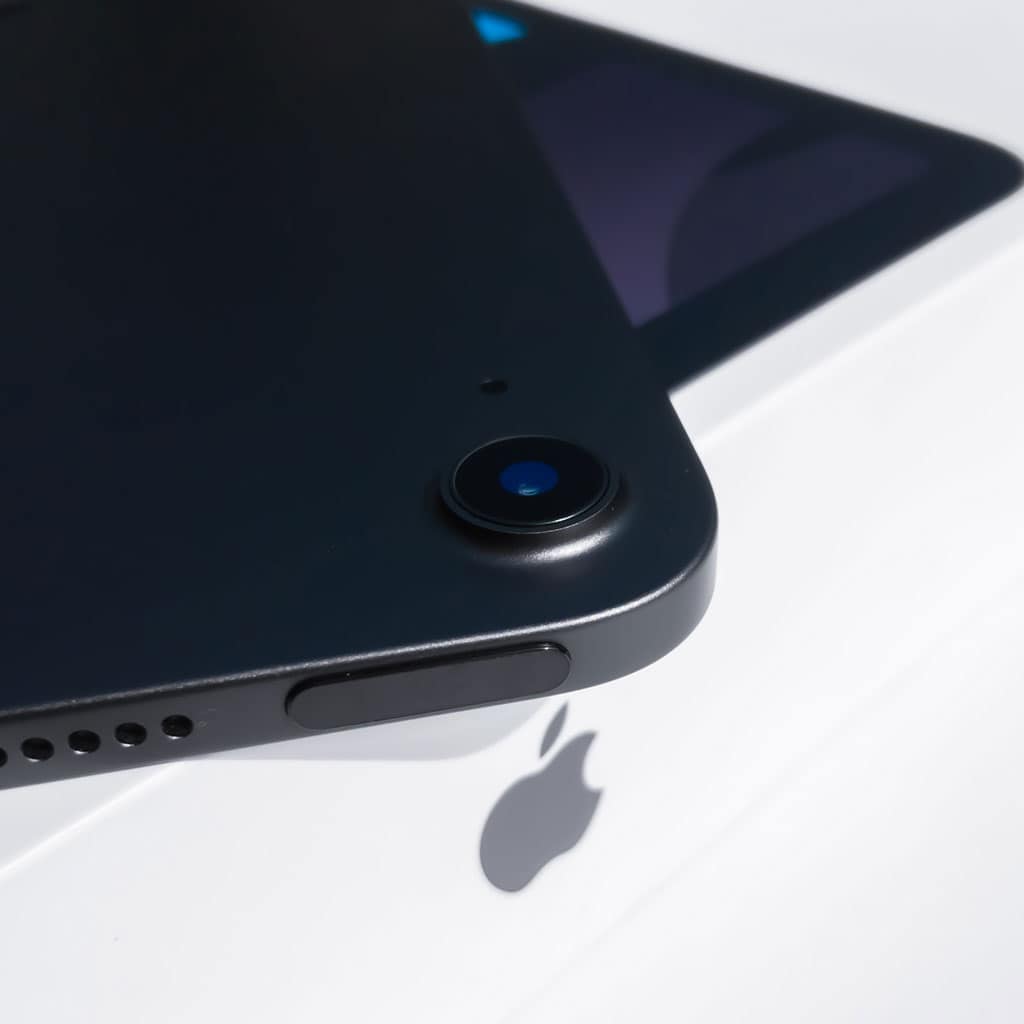
Specifically, the microphone opening is on the back of the iPad near the rear-facing camera. When holding your iPad horizontally in front of you, the microphone is in the top-center of the device.
This allows the iPad to capture audio properly when recording videos or having FaceTime calls. The microphone is positioned to best pick up voices and ambient sounds while using the iPad during typical use.
So, the microphone on an iPad is discreetly located along the top back edge, above the screen and rear camera.
How do I Turn on an iPad’s Microphone?
Here are a few easy ways to turn on the microphone on an iPad:
- Open the Settings app and go to Privacy > Microphone. Make sure the switch next to Microphone is turned on (green). This enables the microphone for all apps.
- Open the Control Center by swiping down from the top right corner. Tap the microphone icon to enable or disable the mic. Grey icon means it’s off, colored means it’s on.
- Check individual apps like Voice Memos, GarageBand or Zoom to make sure they have microphone access enabled in Settings > the app > Microphone.
- Ask Siri a question or make a voice command. This will prompt you to enable the microphone if it’s disabled.
- Make a FaceTime audio or video call. The microphone will be activated when you make a call.
- Record a video in the Camera app. The mic has to be on to capture audio.
What is the iPad Microphone Used For?
Here are some of the main uses of the iPad’s built-in microphone:
- Recording Audio – The microphone allows you to record audio in apps like Voice Memos, GarageBand, and other recording programs. You can capture music, vocals, speeches, interviews and more.
- Video Recording – When recording video using the Camera app or other video apps, the iPad mic captures audio to accompany the video. This allows you to record high-quality videos with sound.
- Phone/FaceTime Calls – The microphone enables you to have phone and FaceTime video/audio calls. It picks up your voice and ambient sounds to transmit to the other caller.
- Siri – The microphone picks up your voice commands and questions to activate Siri. This allows you to get information, open apps, create reminders and more using just your voice.
- Dictation – You can dictate text for emails, messages, notes and documents by speaking into the iPad mic. Your speech is converted to text.
- Gaming – Some games and apps use the microphone for voice chat with other players or to capture audio effects.
What Features to Look for in a Good Microphone for iPad®?
To record really good sounds, you should think about a few important things.
Here are six factors to keep in mind.
Physical Connection
Look for a microphone that connects securely and easily to your iPad, either via the lightning port, USB-C port, or wirelessly via Bluetooth. The connection should feel sturdy without adding too much bulk.
Electrical Connection
Make sure the microphone is compatible with your iPad model. It should draw power from the iPad without draining the battery too quickly. The microphone should also sync properly with the iPad without electrical interference or static.
Audio Quality
Choose a microphone that captures audio clearly, with good depth and range. It should reproduce voices, music and ambient sounds accurately without muffling or distortion. Condenser microphones often provide better audio quality.
Frequency Response
A good microphone has an even frequency response, meaning it captures low, mid and high frequencies evenly. Look for a frequency range of at least 40Hz to 15kHz to record vocals well. An expanded range is better for music recording.
Durability
Considering how you’ll use the microphone, pick one that is sturdy and durable. If you’ll travel with it, get one with a rugged build. Make sure it can withstand minor bumps and drops.
What kind of Microphone Connector is Compatible?
To know which microphone connector works, look at the connector on your Apple device. All iPhones, including the latest iPhone 13 Max, have a Lightning connector introduced ten years ago. There’s no 3.5mm headphone jack.
The current iPad uses a Lightning port, and it’s the only model with a 3.5mm jack. But be careful, other iPads like iPad mini, iPad Air, and iPad Pro have USB-C. So, check your podcast microphone connector for the iPad Pro.
The right iPad microphone isn’t always Lightning-equipped.
Suitable connectors include:
- TRRS: For iPad, common in lavalier microphones. It can also be used with computers and some Android smartphones with a 3.5mm jack.
- Lightning: Fits iPad and iPhone. Using a microphone with a Lightning connector is easy – just plug and play.
- USB-C: Works well with iPad mini/Air/Pro and is also suitable for desktops and laptops.
There are many microphones to choose from. Besides checking the compatible connector, do some research before buying. You can also find compatibility information on the official website.
How to Connect External Microphone to your iPad®?

Here are a few ways to connect an external microphone to an iPad:
- Lightning Port Microphones – Many microphones designed for iOS devices connect directly to the Lightning port. This provides power to the mic and sends audio to the iPad. Examples include the Shure MV88 or Rode smartLav+.
- USB-C Microphones – For iPads with USB-C ports, like iPad Pro models, you can use USB-C microphones. These also connect directly and provide microphone audio over the USB-C cable.
- 3.5mm Adapter – For older iPads with a 3.5mm headphone jack, you can use a 3.5mm to Lightning adapter. Connect this to your iPad, then plug any 3.5mm microphone into the adapter.
- Wireless Microphones – Bluetooth microphones like the Blue Yeti Nano can pair with your iPad wirelessly to record audio without cables. Useful for remote interviews or field recording.
- Audio Interfaces – Audio interfaces like the Shure MVi provide XLR and other ports so you can use professional microphones with your iPad.
- Field Recorders – Connecting a field recorder like the Zoom H4n Pro to your iPad provides high quality microphone preamps and support for XLR mics.
The key is finding a microphone designed to integrate with iOS devices. Do your research to ensure compatibility with your specific iPad model before purchasing any microphone.
Why Should you use an External Microphone for iPad®?
Here are some of the main reasons why you should consider using an external microphone with an iPad:
- Better audio quality – External mics designed for iOS devices can capture higher quality audio with more detail compared to the built-in iPad microphone. They produce clearer, more professional sound.
- More control – External mics provide controls for gain, pattern selection, monitoring, and other settings – allowing you to shape the sound as needed. The built-in mic has no controls.
- Background noise reduction – Directional external mics help isolate the main sound source and minimize background noise. The iPad’s omnidirectional mic picks up all surrounding sounds.
- Wider compatibility – External mics can connect to a wider range of audio gear for broadcasting, recording in the studio and other applications.
- Signal boost – Some external mics have a pre-amp to boost weak audio signals and improve sound quality before sent to the iPad.
- Flexibility – External mics come in different form factors like handheld, lavalier, shotgun etc. to suit different recording needs.
- Durability – Rugged external mics hold up better for outdoor recording in challenging environments. The small iPad mic is fragile.
FAQ’s:
How Many Microphones Does an iPad Have?
The number of microphones on an iPad depends on the model. Most iPads have at least two built-in microphones. Newer models like the iPad Pro can have up to five microphones. These microphones are designed to pick up sound from all directions for phone calls, video recording, and other audio needs. Overall, having multiple microphones allows the iPad to capture high quality audio in different environments.
Why can Nobody Hear me on my iPad?
Here are some common reasons why people may not be able to hear you on an iPad:
- The microphone is disabled in settings or for that app. Double check it is turned on.
- Your finger is covering the microphone hole during calls or recordings. Make sure the mic is unobstructed.
- The volume on the iPad is muted or turned down too low. Turn up the volume.
- There’s an issue with the app you’re using. Try making a test call on FaceTime to isolate the issue.
- The microphone is damaged or obstructed by debris inside. You may need service to fix it.
Can an iPad be used as a Microphone?
Yes, an iPad can be used as a microphone. The built-in microphone on all iPad models allows you to record audio, voice messages, podcasts, and more. You can also use speech-to-text apps to turn your voice into text on an iPad. While it won’t replace a professional microphone, the iPad microphone can capture decent quality audio in a pinch.
Are iPads Equipped with Built-in Microphones?
Yes, all iPads come with built-in microphones. The microphone quality may vary depending on the iPad model and year. You can easily test the microphone by using the Voice Memos app or recording a video. For better audio quality, you can also use external microphones with your iPad.
How do I Record with Microphone for iPad® Video?
To record videos with a microphone for iPad, you’ll need a compatible external microphone. Connect it to your device through the headphone jack or lightning port. Open the video recording app and select the external microphone as your audio source. Test the audio levels for clear sound quality.
Are there any Tips to improve the Sound Quality when Recording with an iPad’s Microphone?
Here are some tips to improve sound quality when recording with an iPad’s built-in microphone:
- Use a quiet location to reduce background noise. Also face away from noise sources like air vents.
- Get close to the iPad microphone when speaking or singing, usually within 1-2 feet. But avoid plosives by not speaking directly into it.
- Tap the screen to focus the microphone on your voice/sound source before recording.
- Enable wind reduction in the Camera app if recording video outdoors. This helps minimize distracting wind noise.
- Buy an inexpensive lapel or clip-on mic to plug into the iPad’s headphone jack for better sound pickup.
- Use a sound dampening case or cover the iPad mic with a windscreen to further reduce noise.
- Edit recordings after the fact to remove unwanted sounds using an audio editing app.
- Use headphones to monitor the audio to ensure good levels and quality while recording.
- Experiment with various iPad positions to find the ideal mic angle for each situation.
Conclusion
In conclusion, iPads do have built-in microphones that are strategically placed for optimal audio capture. You can easily access and turn on the microphone through the device’s settings.
However, if you’re looking for enhanced audio quality or specific features, it is recommended to use an external microphone that is compatible with your iPad.
When choosing an external microphone, consider factors such as physical and electrical connection, audio quality, frequency response, durability, and overall functionality.
Connecting an external microphone to your iPad is simple and can be done using different types of connectors.
Using an external microphone can greatly improve the audio recording capabilities of your iPad, making it ideal for activities such as video recording, podcasting, or conducting interviews.